How Tvorya works - a guide for beginners
Let your imagination unfold! You do not need to be a talented designer or a technical expert to make beautiful things. This guide shows you how to use the platform, turn your ideas into reality and create the designs you have always wanted.
Start creatingIn short - the steps you will go through
From the home page to the finished file, in a few clicks - in minutes.
Choose a product
An invitation, a card, a caricature or an art print. Four different products, each one made in a few easy steps.
Describe it in a few fields
A few questions about the occasion, the theme and the colours. Write freely, in your own words.
Final touches
The finished design opens in the editor. Here you can make last corrections, add something of your own or try again with a different description.
Download
You pay once and receive the finished design in the format that suits your needs.
First step - what will you create?
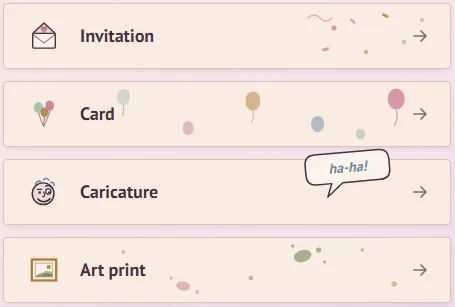
Invitation
For a birthday or a wedding.
Have ready: the details of the event and your idea for the design.
Card
A greeting for any occasion.
Have ready: your idea for the design and what we should write on the card.
Caricature
A memory served with a smile.
Have ready: a photo of the person and a few words about the scene.
Art print
Art for your wall: painting, graphics, digital world or photography.
Have ready: a description of what you have in mind. A photo is optional.
What each one costs is on the Prices page.
Second step - your imagination
Creating any design goes through a few short and easy steps. There are small differences between the products, but the most important ingredient is always the same - your imagination.
Layout
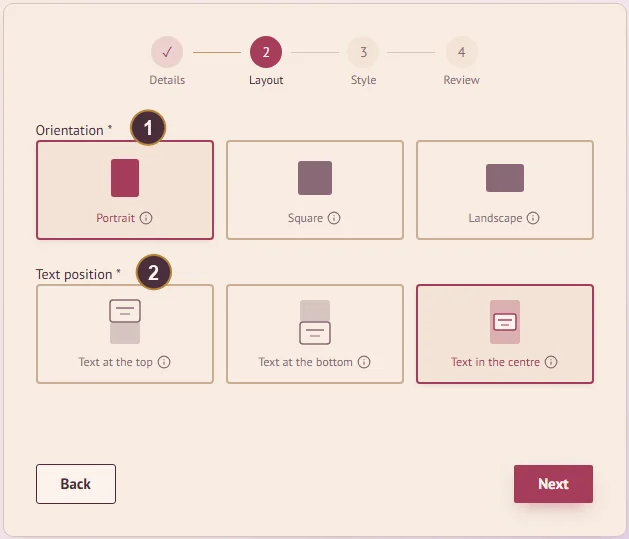
Here you choose the shape of the design and, if it includes text, where that text should sit.
- OrientationPortrait, square or landscape. All four kinds of design ask this, because it sets the shape of the finished file. The choice carries over to print - in portrait or landscape the design fits the standard A6, A5, A4 and A3 sizes exactly, with no trimming at the edges and no extra resizing.
- Text positionAt the top, at the bottom or in the centre. Here you choose where the text should sitThis question appears for invitations only. Cards carry text too, but there the text finds the best place on the canvas by itself. Caricatures and art prints carry no text on the design itself, so this step does not appear for them.
Style
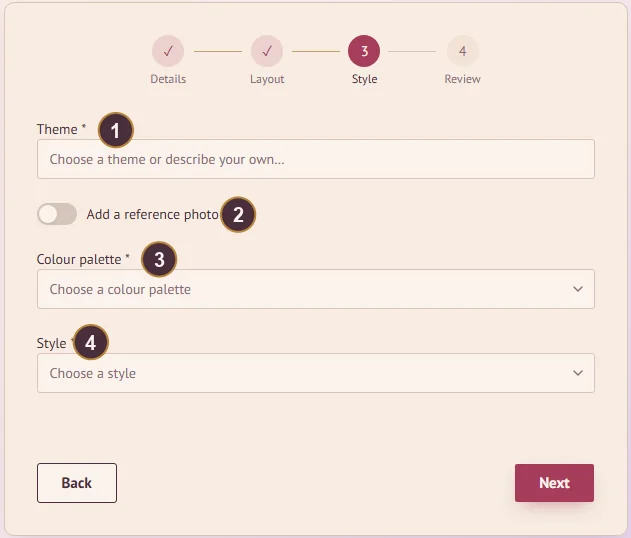
The four fields on this screen are where you give your imagination free rein and set the direction of the design. Here you describe how you picture it - you do not need to think like a designer, only to let your imagination out.
- ThemeThis is where you say in words what you want to see in your design. Describe the idea, the scene, the characters or the details you picture, and let your imagination set the direction. You do not need to know exactly how it should look - sharing your idea is enough.
- Add a reference photoOptional. Attach a photo that hints at the direction - mood, colours, kind of drawing. It adds to the theme, it does not replace it.
- Colour paletteThe tone of the design. Every palette shows its colours so you can see what you are choosing. If you have no preference, "Trust the theme" will pick the best combination of colours for you.
- StyleThe character: playful, formal, warm. The theme says what should be drawn, the style says how it should be presented.
Review
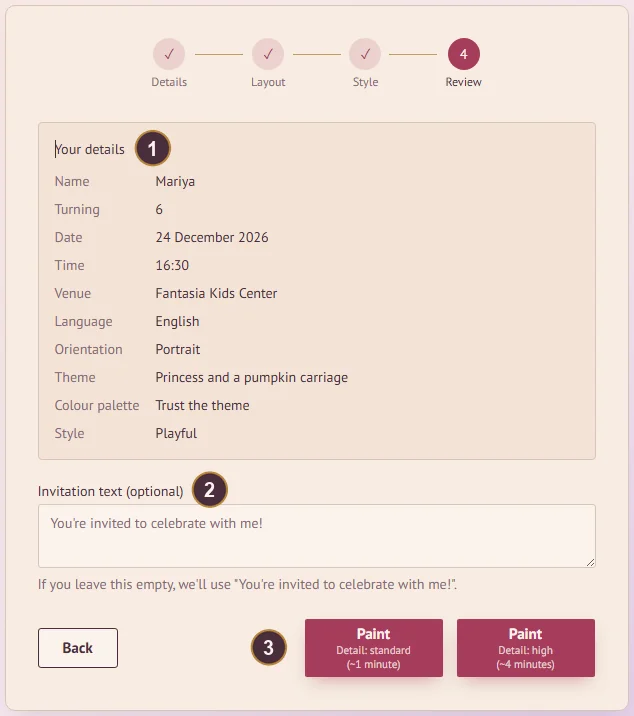
The last screen shows everything in one place and leaves one thing in your hands: the words on the design.
- Your detailsEverything you have entered so far, gathered for a final check. If something is not right, "Back" returns you to that step without losing the rest.
- The text on your designHere you enter the text you want to appear on the design. If you leave the field empty, we will suggest something suitable and show it to you beforehand, so there are no surprises. This option is available for invitations and cards only.
- The Paint buttonOne press and the model starts painting. The design opens by itself in the editor as soon as it is ready.
Mixing the colours
This is what the screen looks like while you wait.
The magic... waiting for the artist
As soon as you press one of the "Paint" buttons, work on your design begins. Nothing more is asked of you - leave the page open and wait for it to finish.
- How long it takesAbout a minute at standard detail and about four at high. As soon as the design is ready it opens in the editor by itself - there is no need to refresh the page.
- If something goes wrongIt happens - for example when the description runs into one of our limits. We will tell you what happened, and everything you entered stays saved so you can try again.
The editor - where the idea becomes real
The finished design opens here. This is your workshop - change things, experiment, save different versions and turn the design into exactly what you pictured. And when you are happy, simply download the file.
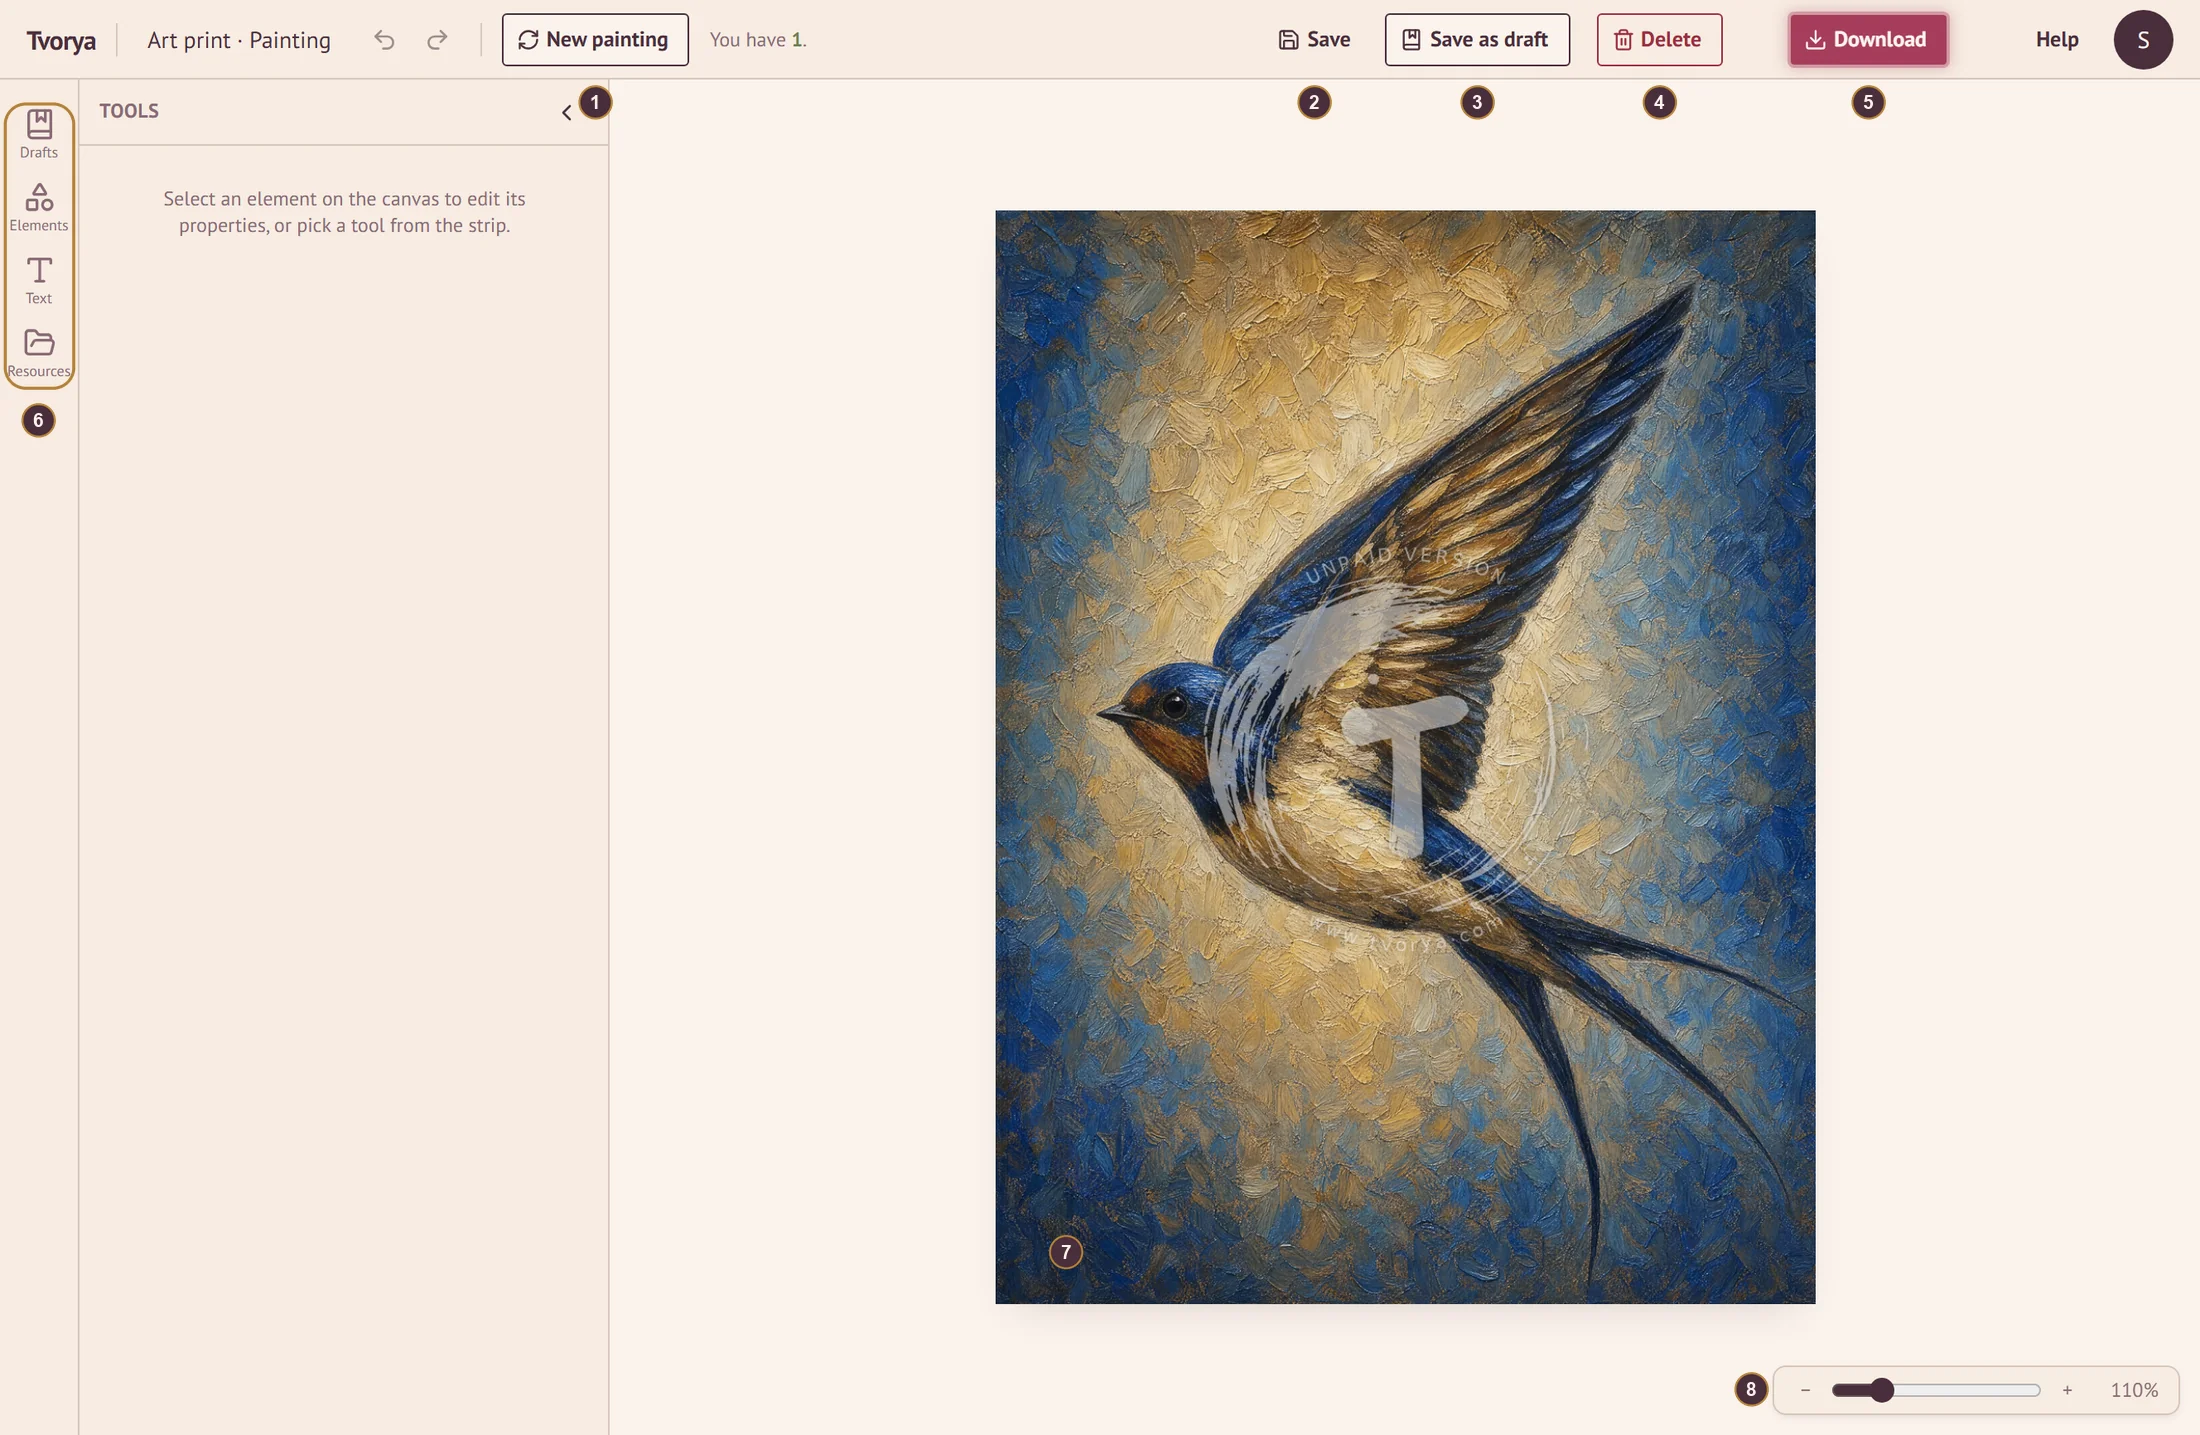
- New paintingNot taken with the result? Ask for a new painting on the same description or a changed one, and see another reading of your idea. Next to the button you will see how many tries you have left.
- SaveSaves the changes to the current version, so you can carry on with it or come back to it later. For your convenience, changes are also saved automatically at short intervals.
- Save as draftCreates a new version without changing the current one. That way you keep both and can carry on with whichever you prefer.
- DeleteRemoves the design together with all the resources belonging to it.
- DownloadThis is where you move on to paying and to downloading the finished files. We look at those steps in detail below.
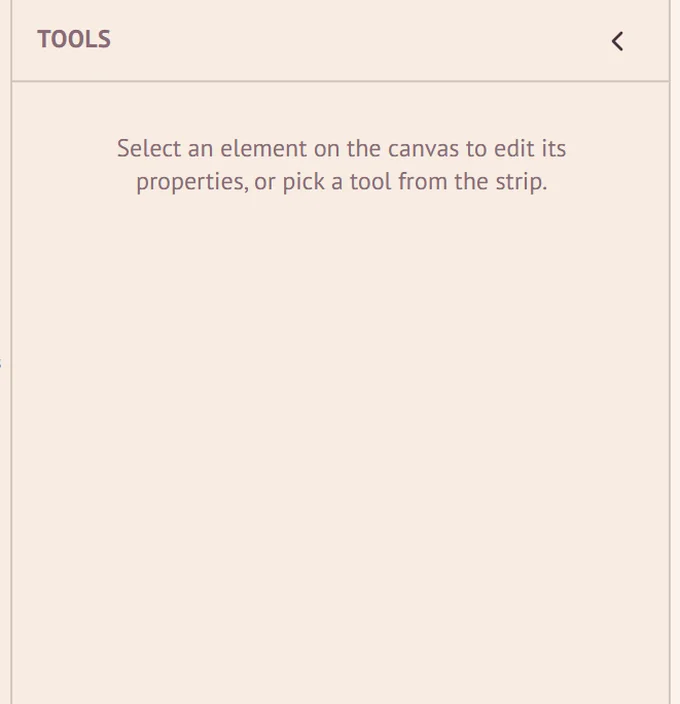
- The toolsThe four tabs on the left - Drafts, Elements, Text and Resources - open different panels of tools for working on the design. From here you can add, change and arrange elements in it.
- The canvasHere you see the design itself. This is your working canvas. The watermark appears only on the view inside the editor - the downloaded file has no watermark.
- ZoomZooms the view in and out. It does not change the design.
The four panels
Each of the four buttons on the left opens its own panel. Here is what each one holds.
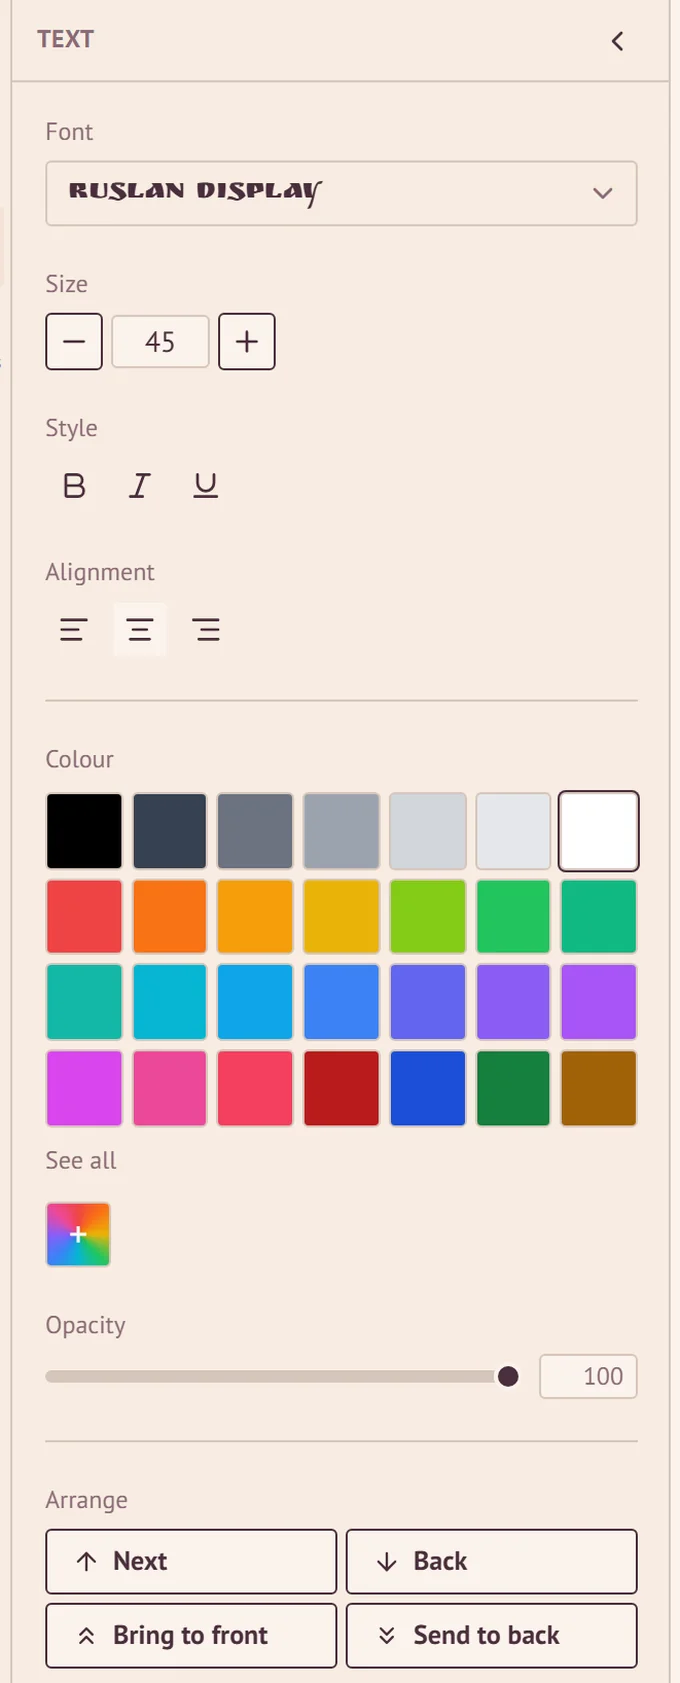
Text
Lets you add text to the canvas. With it selected, you can change the font, the size, the style, the alignment, the colour, the transparency and its position relative to the other elements.
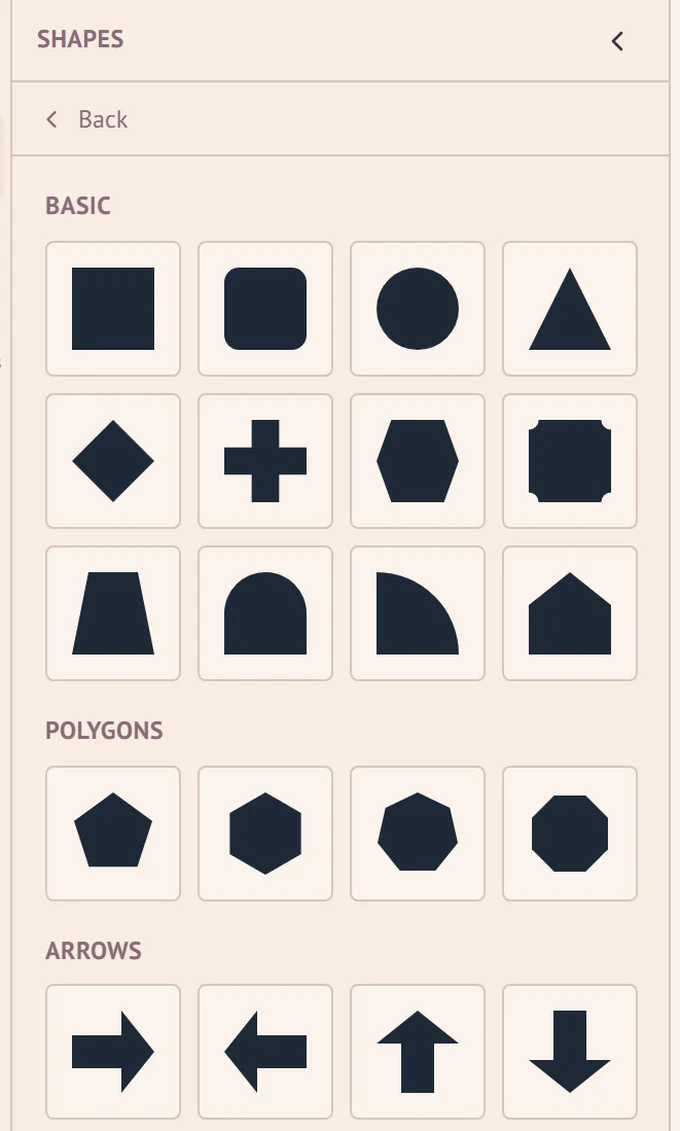
Elements
A library of ready-made shapes: basic figures, polygons, arrows, clouds, hearts and more. Press a shape and it appears on the canvas, where you move, resize and colour it like everything else.
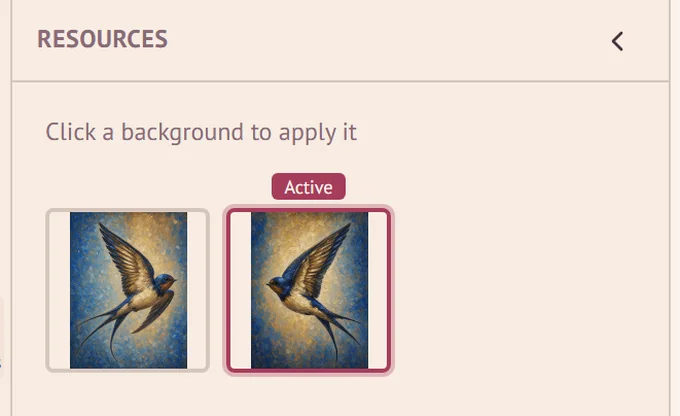
Resources
Every painting you have asked for on this design stays here. Press one to bring it back to the canvas.
Drafts
The versions of one and the same design. You work on one, save it as a new one, and go back to the earlier one if you prefer it.
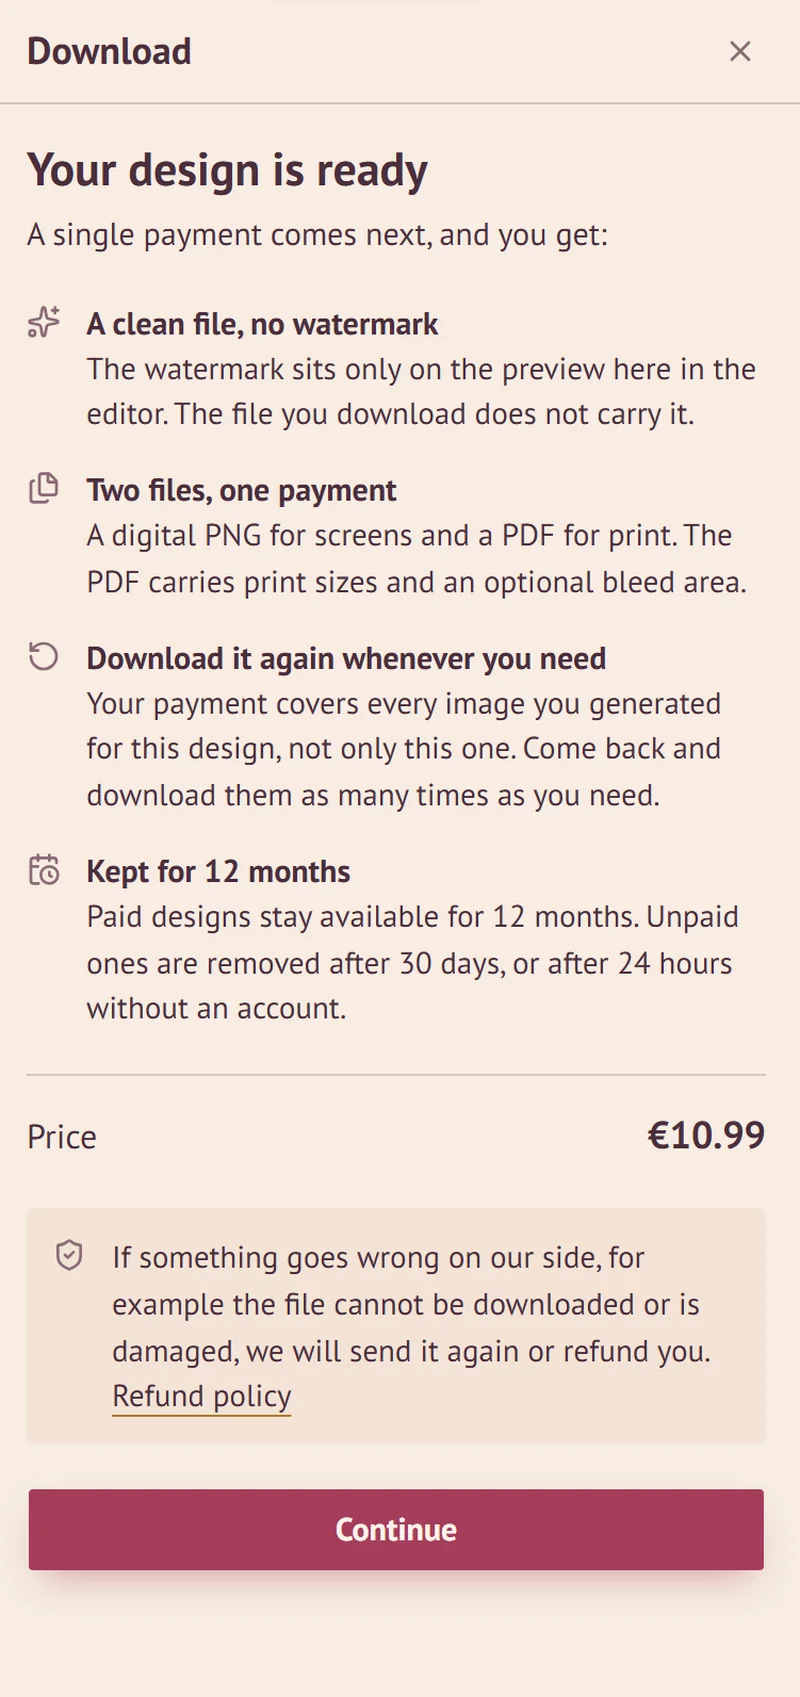
Time to get your design - "Download"
You press "Download" and get the file you need.
What you get
Before you pay, this is where you see exactly what the price covers - a clean file with no watermark, a PNG for the screen and a PDF for print, the option to download the design again, and how long we will keep it for you. The price is here too, so you know everything in advance. If you have a discount code, it is applied at the next step - the payment.
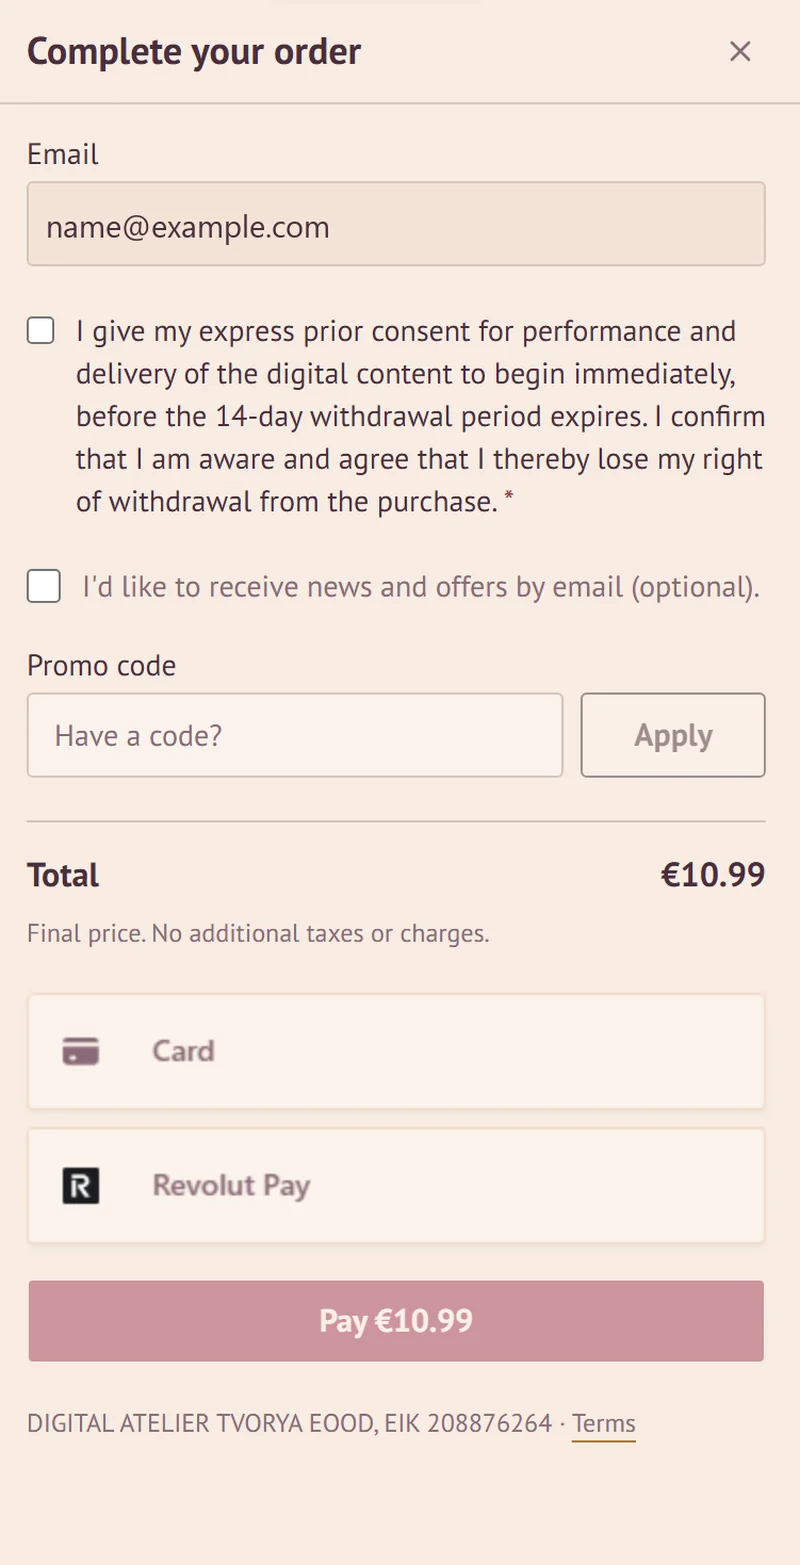
The order
Your email is already filled in, you confirm the immediate-delivery condition, enter a promo code if you have one, and pay by card or Revolut Pay. The price is final, with no additional taxes or fees.
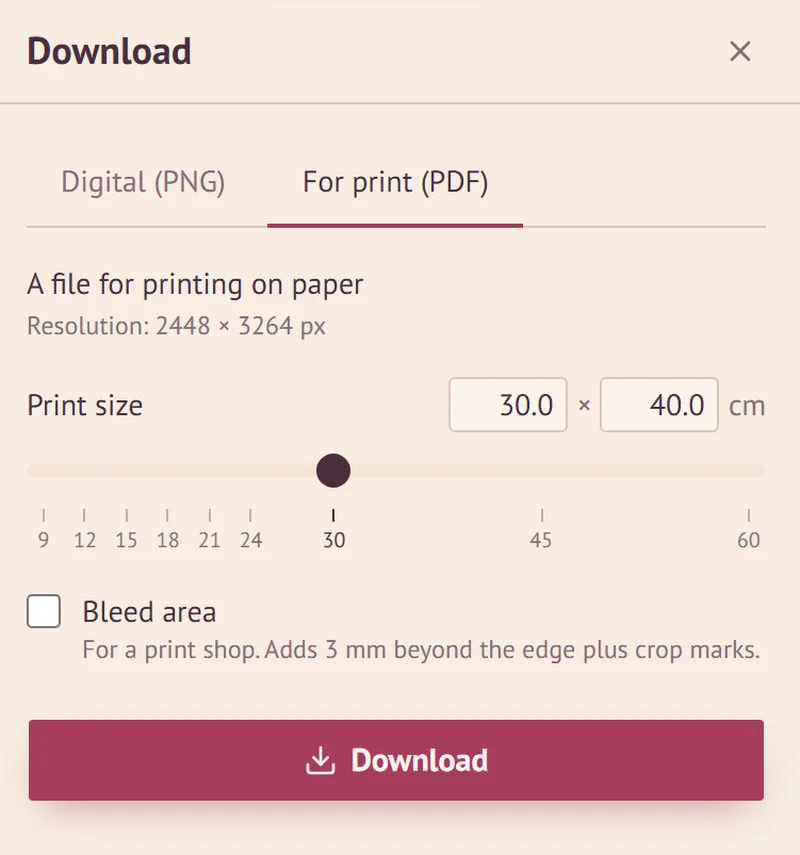
The file
Here are the finished files - one for the screen and one for paper. The PNG suits sharing and use online, and the PDF is for print. With the PDF you choose the size, and if the design is going to a print shop you can add a bleed margin with a single tick. The print file needs no further processing.
Your account - the home of your designs
You do not have to finish everything in one go. With an account every design stays saved and waits for you - come back whenever you like and carry on from where you left off. There are three places in your account.
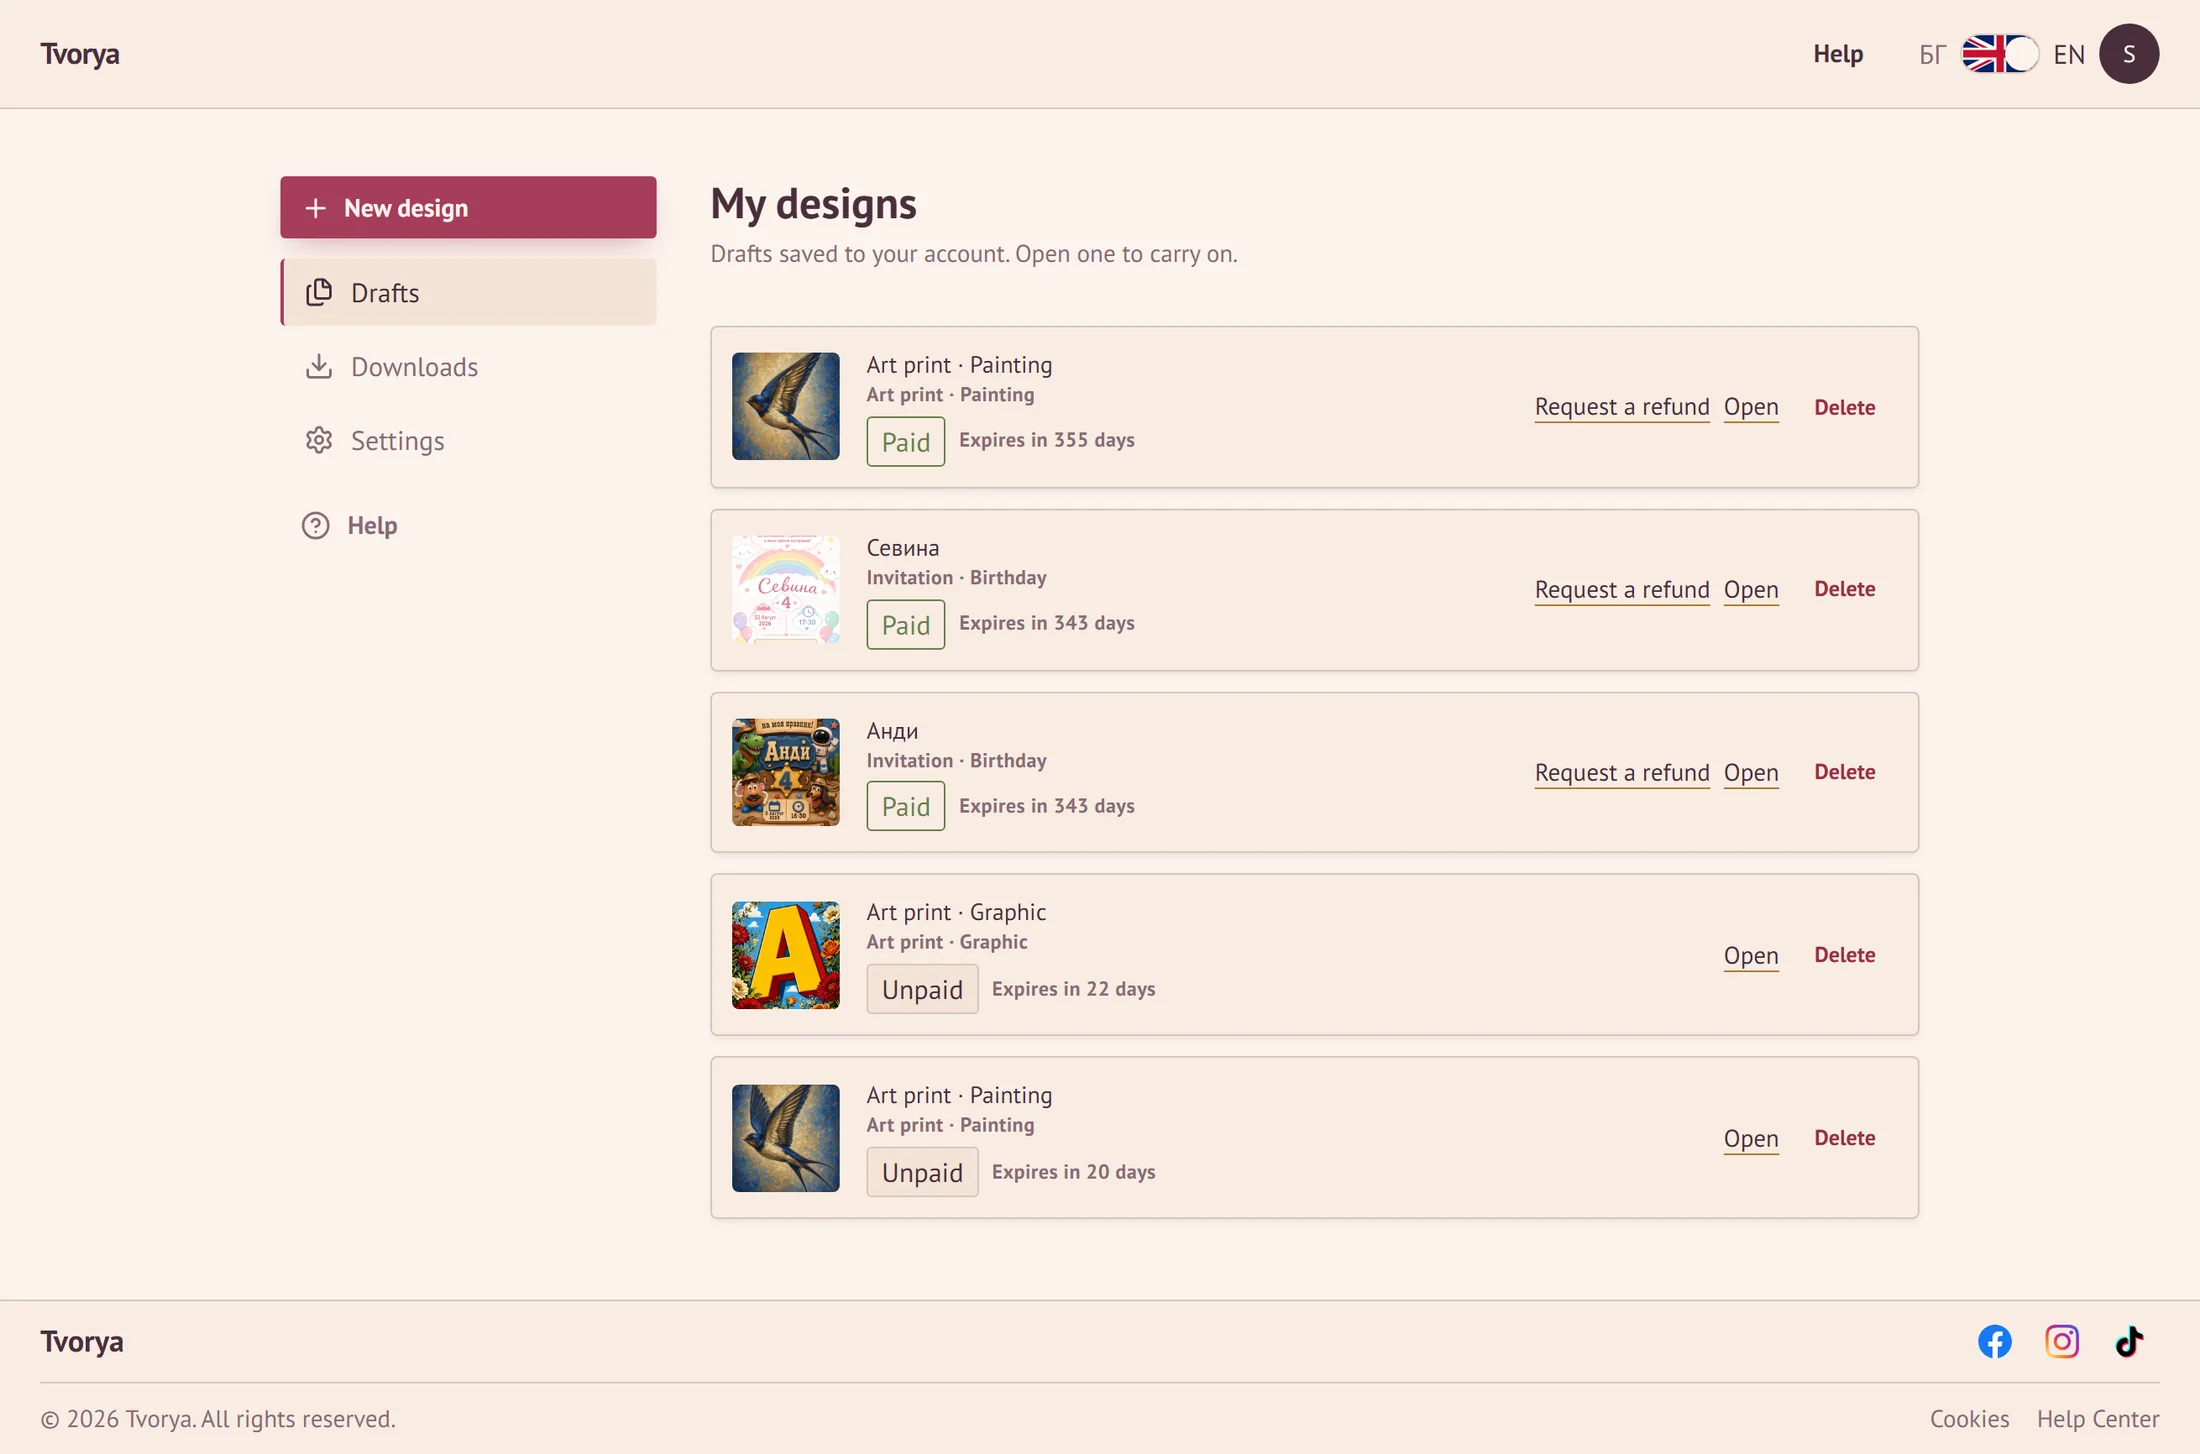
My designs
Everything you have started is here, the finished and the unfinished alike. You open a design and carry on working on it. Next to each one you can see whether it is paid and how much longer we will keep it.
Paid designs also carry "Request a refund". If there is something wrong with what you received, that is where you describe it briefly and we reply by email.
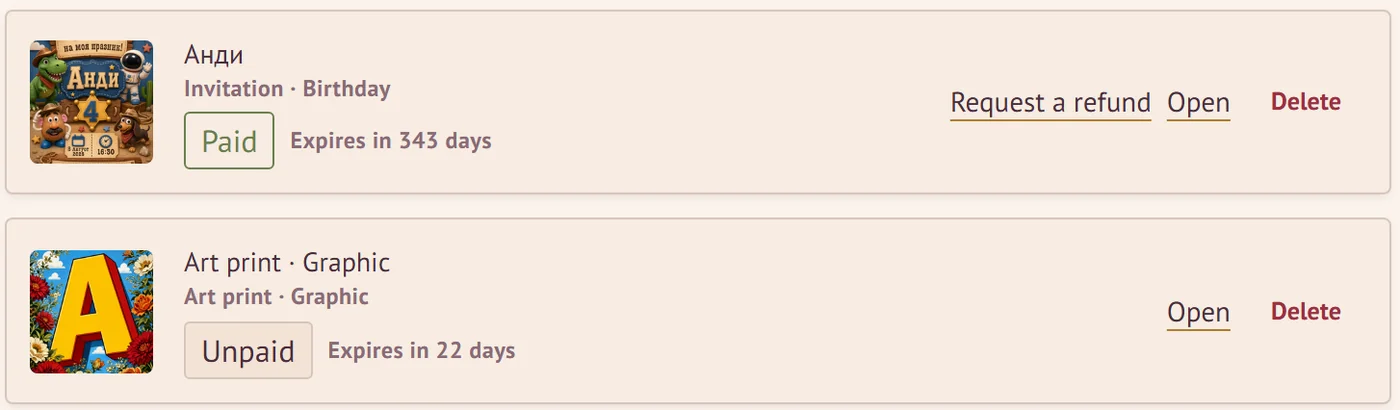
Downloads
The files you have already bought sit here. You download them again with one press, without going through the editor and without paying a second time.
They stay available even if you delete the design they were made from.
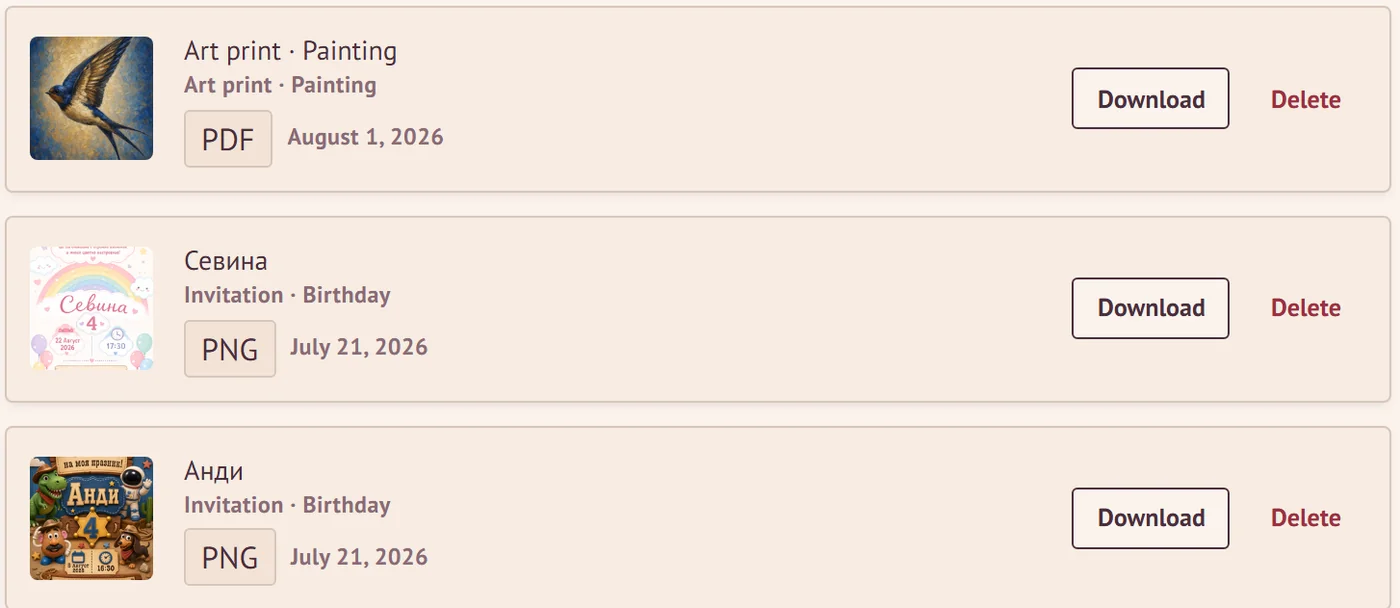
Settings
Here are your email and the way you sign in. You can change your email or your password and, if you decide to, delete your account together with everything in it.
Now it is your turn
We have gone the whole way - from choosing a product to the finished file. Nowhere along it did you need design experience or technical skills. An idea is what is needed; the rest we take care of.